Ensuring healthy INR levels is extremely important. If your dose is too low, you can develop harmful blood clots, and an amount too high puts you at risk of serious bleeding or stroke.
What is PT/INR testing?
A prothrombin time (PT) test measures how long it takes for a clot to form in your blood sample, and INR (international normalized ratio) is the data gained from the test results. Patients typically get their PT/INR checked at their practitioner's office or clinic every four to six weeks. However, conducting regular INR tests at home is the best way to help ensure your body is responding to medication correctly.
You do not need any medical experience or technology skills to take an INR test at home. Learn what PT/INR testing is and how you can safely use INR machine test strips from home to keep track of your cardiac health.
How to use PT/INR test strips
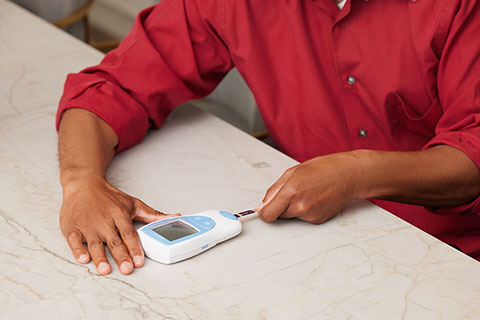
Using INR test strips is quick and easy and only requires a small blood sample to produce results. Simply place a blood sample on an INR test strip, insert it into the INR meter, and the meter will calculate the results in approximately one minute. Here is a step-by-step guide to completing a test using INR strips.
1) Remove the strip from its vial
Once you remove an INR test strip from the vial for testing, it is only usable for up to ten minutes. If the strip is left out too long, especially in high humidity or high temperatures, the strip's integrity could be damaged. If the strip is damaged and unusable, a built-in quality control function on the INR meter will display an error message. If your strip is defective, the meter will not give you any INR data, so you do not have to worry about receiving inaccurate results. Once you have removed a test strip from the vial, always be sure to secure the cap on the vial tightly.
2) Prepare the strip and INR machine
Once you have removed the strip from the package, insert it into the INR meter.
- CoaguChek ®
- Coag-Sense ®
Do NOT prick your finger or apply blood at this time.
3) Apply blood to the strip
Once the warm-up period is complete, the machine will beep and begin a 180-second countdown period. During the countdown process, use the lancet to prick the fleshy side of your fingertip. Massage your finger until a ladybug-sized drop of blood appears.
For more detailed description on applying blood to strip please select link below for your meter type: CoaguChek ® or Coag-Sense®
4) See your results
When you have applied enough blood to the clear section of the strip, the machine will beep, the countdown numbers will disappear, and testing will begin. Once the results appear, call them into the number provided on your patient PIN card, or report your results via the mdINR App (Apple or Google Play).
Self-INR testing is a quick and easy way to monitor the risk factors that can cause a heart attack or other conditions. Completing regular tests from home mitigates the risk of complications and provides peace of mind in knowing where your health stands. These tests save time, create a testing schedule, and allow you to take better control of your health.
How Lincare can help
We are here as a trusted care partner in your journey to better health. Our team will empower you to make the most of your treatment and embrace a higher health-related quality of life. With offices around the country, and clinical staff available 24/7, we are always ready to answer any questions and provide assistance in any way we can.
Disclaimer: INR testing services are provided by our affiliate mdINR.